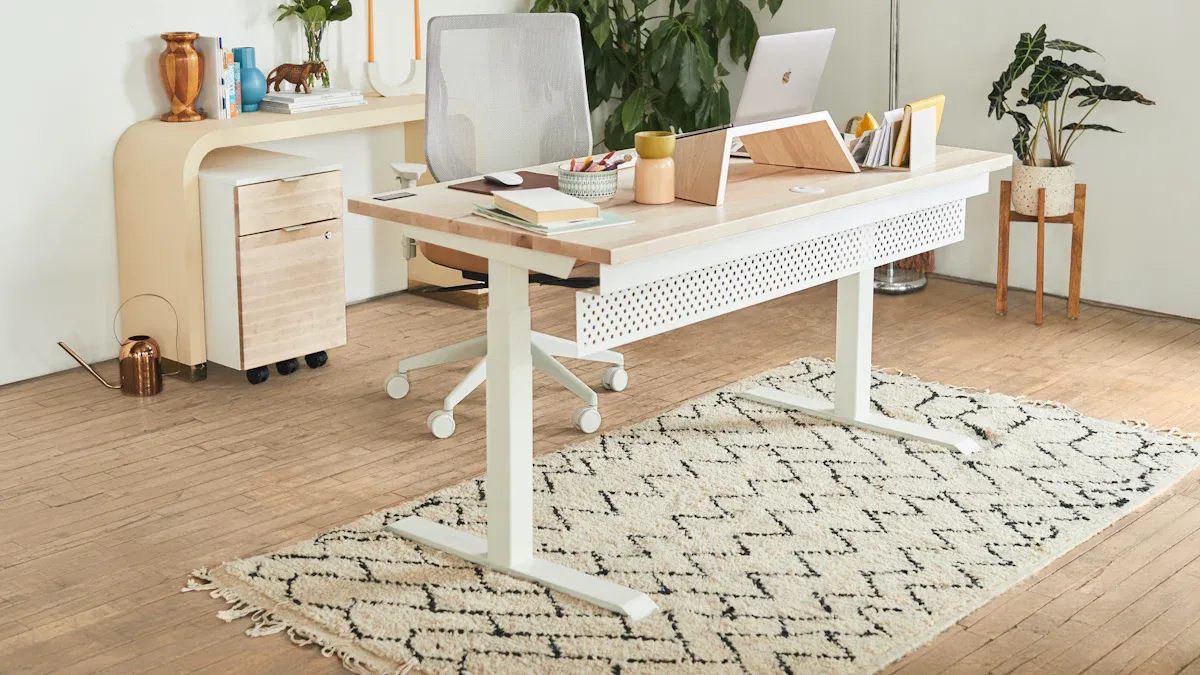
As you prepare to set up your Pneumatic Sit-Stand Desk, it’s essential to understand the assembly of a Pneumatic Sit-Stand Desk. You’ll need a few tools and materials to make the task easier. Don’t worry if you encounter any issues; knowing how to assemble sit stand desk and troubleshooting common problems during assembly can save you time and frustration. With a little patience, you’ll have your china Pneumatic Standing Desk ready in no time!
Key Takeaways
- Gather essential tools like a screwdriver, Allen wrench, level, measuring tape, and rubber mallet before starting assembly. This preparation saves time and makes the process smoother.
- Identify and check all desk components after unpacking. Ensure you have everything listed in the instruction manual to avoid delays during assembly.
- Follow the correct steps to attach the legs and secure the crossbar for a stable base. Proper alignment is crucial for the desk’s overall stability.
- Test the pneumatic mechanism after installation to ensure smooth height adjustments. Address any issues immediately to avoid future problems.
- Make final adjustments to level the desk and ensure stability. A well-leveled desk enhances comfort and protects your equipment.
Preparation for Assembly
Before diving into the assembly of your Pneumatic Sit-Stand Desk, it’s crucial to gather the right tools and materials. This preparation will make the process smoother and more enjoyable. Let’s break it down!
Tools for Pneumatic Sit-Stand Desk
You’ll need a few essential tools to get started. Here’s a handy list:
- Screwdriver: A Phillips head screwdriver is usually best for most screws.
- Allen Wrench: This often comes with your desk, but if not, make sure you have one that fits the screws.
- Level: To ensure your desk is perfectly balanced.
- Measuring Tape: Useful for checking dimensions and ensuring everything fits correctly.
- Rubber Mallet: This can help gently tap parts into place without damaging them.
Tip: Gather all your tools in one place before you start. This way, you won’t waste time searching for them mid-assembly!
Materials for Pneumatic Sit-Stand Desk
Next, let’s talk about the materials you’ll be working with. Here’s what you should have on hand:
- Desk Frame: This includes the legs and crossbar.
- Pneumatic Cylinder: The heart of your sit-stand mechanism.
- Desktop: The surface where you’ll place your computer and other items.
- Screws and Bolts: These will secure everything together.
- Instruction Manual: Always keep this handy for reference.
Note: Double-check that you have all the components listed in your instruction manual. Missing parts can delay your assembly process.
With your tools and materials ready, you’re well on your way to assembling your Pneumatic Sit-Stand Desk. The next steps will guide you through unpacking and identifying all the components.
Unpacking the Desk Components
Now that you have your tools and materials ready, it’s time to unpack the desk components. This step is crucial for ensuring you have everything you need before you start assembling your Pneumatic Sit-Stand Desk.
Identifying Parts of the Pneumatic Sit-Stand Desk
As you unpack, take a moment to identify each part. Here’s a quick list of what you should find:
- Desk Frame: This includes the legs and crossbar.
- Pneumatic Cylinder: This is the mechanism that allows you to adjust the height.
- Desktop: The surface where you’ll place your computer and other items.
- Screws and Bolts: These will secure everything together.
- Instruction Manual: Keep this handy for reference.
Tip: Lay out all the components on a flat surface. This way, you can easily see everything and avoid confusion later.
Checking for Missing Items
Once you’ve identified all the parts, it’s time to check for any missing items. Here’s how to do it:
- Cross-Reference: Use your instruction manual to cross-reference each item. Make sure you have everything listed.
- Inspect Packaging: Sometimes, small parts can get stuck in the packaging. Check all boxes and bags thoroughly.
- Contact Support: If you find anything missing, don’t hesitate to reach out to customer support. They can help you get the parts you need.
Note: Missing parts can delay your assembly process. It’s best to address this before you start putting everything together.
With all components identified and checked, you’re ready to move on to the next steps of assembly. Let’s get started on building your new Pneumatic Sit-Stand Desk!
Assembling the Base
Now that you’ve unpacked everything, it’s time to start assembling the base of your Pneumatic Sit-Stand Desk. This part is crucial because a sturdy base supports the entire desk. Let’s dive into the steps!
Attaching the Legs of the Pneumatic Sit-Stand Desk
First, grab the legs of your desk. You’ll notice that each leg has pre-drilled holes. Here’s how to attach them:
- Position the Legs: Place each leg in the correct position on the frame. Make sure they align with the holes.
- Insert Screws: Use your screwdriver to insert the screws into the holes. Tighten them securely, but don’t overdo it. You want a snug fit without stripping the screws.
- Check Alignment: After attaching all legs, double-check their alignment. They should stand straight and even.
Tip: If you have a friend around, ask them to hold the legs in place while you screw them in. This makes the process easier!
Securing the Crossbar
Next, it’s time to secure the crossbar. This piece adds stability to your Pneumatic Sit-Stand Desk. Here’s how to do it:
- Locate the Crossbar: Find the crossbar that connects the legs. It usually has holes on both ends.
- Align with Legs: Position the crossbar between the legs. Ensure the holes on the crossbar align with the holes on the legs.
- Insert Bolts: Use the bolts provided to secure the crossbar. Insert them through the holes and tighten them with your Allen wrench. Again, make sure they’re snug but not overly tight.
Note: A well-secured crossbar prevents wobbling and enhances the overall stability of your desk.
With the legs and crossbar attached, you’ve completed the base assembly! You’re one step closer to enjoying your new Pneumatic Sit-Stand Desk. Next, we’ll move on to installing the pneumatic mechanism.
Installing the Pneumatic Mechanism
Now that you’ve assembled the base, it’s time to install the pneumatic mechanism. This part is essential for allowing your desk to adjust between sitting and standing positions. Let’s break it down step by step!
Connecting the Pneumatic Cylinder
First, you’ll need to connect the pneumatic cylinder. This cylinder is what makes your Pneumatic Sit-Stand Desk adjustable. Here’s how to do it:
- Locate the Pneumatic Cylinder: Find the cylinder, which usually looks like a metal tube with a piston inside.
- Position the Cylinder: Insert the cylinder into the designated hole in the center of the crossbar. Make sure it fits snugly.
- Secure the Cylinder: Use the provided screws to secure the cylinder in place. Tighten them with your Allen wrench, but be careful not to overtighten. You want it secure, but not so tight that it damages the cylinder.
- Check Alignment: Ensure the cylinder is aligned vertically. This alignment is crucial for smooth height adjustments later.
Tip: If you have trouble inserting the cylinder, try wiggling it gently while pushing down. This can help it slide into place more easily.
Testing the Pneumatic Mechanism
Once you’ve connected the pneumatic cylinder, it’s time to test the mechanism. This step ensures everything works correctly before you attach the desktop. Here’s how to do it:
- Stand Back: Make sure you’re at a safe distance from the desk.
- Adjust the Height: Locate the lever or button that controls the height adjustment. Press it to see if the desk rises or lowers smoothly.
- Observe the Movement: Watch for any jerky movements or unusual noises. If the desk moves smoothly, you’re in good shape!
- Test the Range: Adjust the desk to its highest and lowest settings. This test ensures the pneumatic mechanism operates throughout its full range.
Note: If you notice any issues during testing, double-check your connections. Sometimes, a loose screw can cause problems.
With the pneumatic mechanism connected and tested, you’re almost ready to attach the desktop. This step is crucial for completing your Pneumatic Sit-Stand Desk setup!
Attaching the Desktop
Now that you’ve installed the pneumatic mechanism, it’s time to attach the desktop. This step is where your Pneumatic Sit-Stand Desk starts to take shape! Let’s go through the process together.
Aligning the Desktop
First, you need to position the desktop correctly. Here’s how to do it:
- Get Help: If possible, ask a friend to assist you. The desktop can be heavy and awkward to handle alone.
- Position the Desktop: Carefully place the desktop on top of the assembled base. Make sure it’s centered and aligned with the legs.
- Check the Edges: Look at the edges of the desktop. They should be even with the legs on both sides. Adjust as needed to ensure everything looks straight.
Tip: Take a moment to step back and check the alignment from a distance. Sometimes, a little perspective can help you spot any misalignments.
Securing the Desktop
Once you’re satisfied with the alignment, it’s time to secure the desktop. Follow these steps:
- Locate the Screws: Find the screws that came with your desk. These will hold the desktop in place.
- Insert Screws: Use your screwdriver to insert the screws into the pre-drilled holes on the underside of the desktop. Make sure to tighten them securely, but don’t overtighten. You want a firm hold without damaging the wood.
- Double-Check: After securing all screws, give the desktop a gentle shake. It should feel stable and secure. If it wobbles, check the screws again.
Note: A well-secured desktop ensures that your Pneumatic Sit-Stand Desk remains sturdy during use. You want to feel confident when adjusting the height!
With the desktop attached, you’re almost finished! The next steps will focus on making final adjustments to ensure your desk is perfectly set up for your needs.
Final Adjustments
Now that you’ve assembled your Pneumatic Sit-Stand Desk, it’s time for the final adjustments. These steps will ensure your desk is perfectly set up for your comfort and productivity.
Leveling the Pneumatic Sit-Stand Desk
Leveling your desk is crucial for a stable workspace. Here’s how to do it:
- Check the Surface: Place your desk on a flat surface. If the floor is uneven, you might need to adjust the legs.
- Use a Level: Grab your level tool. Place it on the desktop to see if it’s even. If one side is higher, you’ll need to adjust that leg.
- Adjust the Legs: Most sit-stand desks have adjustable legs. Turn the leg clockwise to raise it or counterclockwise to lower it. Keep checking with the level until everything is even.
Tip: Take your time with this step. A level desk helps prevent items from sliding off and makes your workspace more comfortable.
Ensuring Stability
A stable desk is essential for a good working experience. Here’s how to ensure your Pneumatic Sit-Stand Desk is sturdy:
- Check All Screws and Bolts: Go over each screw and bolt you installed. Make sure they’re tight but not overly so. Loose screws can lead to wobbling.
- Test the Desk: Gently push down on different areas of the desktop. If it feels shaky, check the connections again.
- Add Weight: Place some items on the desk to see how it holds up. If it wobbles with weight, you may need to adjust the legs or tighten screws.
Note: A stable desk not only feels better but also protects your equipment from damage.
With these final adjustments, your Pneumatic Sit-Stand Desk will be ready for use. You’re all set to enjoy the benefits of a flexible workspace!
Troubleshooting Common Issues
Addressing Height Adjustment Problems
Sometimes, you might face issues with the height adjustment of your Pneumatic Sit-Stand Desk. Here are some common problems and how to fix them:
- Desk Won’t Move: If your desk doesn’t rise or lower, check the pneumatic cylinder connection. Make sure it’s securely attached to the crossbar.
- Uneven Movement: If the desk moves unevenly, inspect the legs. They should all be at the same height. Adjust any leg that seems off.
- Stuck Mechanism: If the mechanism feels stuck, try gently wiggling the lever or button while pressing it. Sometimes, a little extra push can help.
Tip: Regularly check the pneumatic cylinder for any signs of wear. Keeping it in good shape ensures smooth operation.
Fixing Stability Concerns
A wobbly desk can be frustrating, but you can easily fix stability issues. Here’s what to do:
- Check All Screws and Bolts: Go over every screw and bolt you installed. Make sure they’re tight. Loose screws can lead to wobbling.
- Inspect the Floor: Sometimes, an uneven floor can cause stability issues. Use a level to check if your desk sits evenly. If not, adjust the legs accordingly.
- Add Weight: If your desk still feels unstable, try placing heavier items on it. This can help anchor it down and reduce wobbling.
Note: A stable desk not only feels better but also protects your equipment from damage.
By following these troubleshooting tips, you can enjoy a smooth and stable experience with your Pneumatic Sit-Stand Desk. If problems persist, don’t hesitate to reach out to customer support for further assistance. Happy working!
Congratulations on assembling your Pneumatic Sit-Stand Desk! Here’s a quick recap of the steps you took:
- Preparation: Gathered tools and materials.
- Unpacking: Identified and checked all components.
- Base Assembly: Attached legs and secured the crossbar.
- Pneumatic Mechanism: Connected and tested the cylinder.
- Desktop Attachment: Aligned and secured the desktop.
- Final Adjustments: Ensured leveling and stability.
Remember, following instructions carefully makes the process smoother. Now, enjoy your new desk setup! It’s time to work comfortably and boost your productivity!
FAQ
What tools do I need to assemble my Pneumatic Sit-Stand Desk?
You’ll need a Phillips head screwdriver, an Allen wrench, a level, measuring tape, and a rubber mallet. Having these tools ready will make your assembly process smoother.
How long does it take to assemble the desk?
Typically, you can assemble your Pneumatic Sit-Stand Desk in about 1 to 2 hours. This time may vary depending on your experience and whether you have help.
Can I adjust the height while using the desk?
Yes! The pneumatic mechanism allows you to adjust the height easily while using the desk. Just press the lever or button, and you can switch between sitting and standing positions.
What should I do if my desk feels wobbly?
If your desk feels wobbly, check all screws and bolts to ensure they’re tight. Also, make sure the legs are level. Adjust any uneven legs to stabilize the desk.
Is there a weight limit for the desk?
Yes, most Pneumatic Sit-Stand Desks have a weight limit. Check the manufacturer’s specifications in your instruction manual to ensure you don’t exceed this limit for optimal stability.

Post time: Sep-03-2025